Makin’ Home Cured Bacon sounds a lot harder than it is. My goal on What I Ate is to simplify it down so that anyone who can measure dry and wet ingredients can make the best bacon that you have ever had.
A few tips as we get going. Please use high-quality ingredients. I will post links to the exact items that I use in my bacon. Please feel free to use brands that you love. Just remember that it makes a huge difference using a premium black pepper-like Watkins Pure Black Pepper vs. using a store brand black pepper. Also, using dark brown sugar vs. light brown sugar adds so much extra flavor! Also, getting a good pink salt (Prague Powder #1) I highly recommend if you don’t have the exact type of ingredient that you should wait to cure your bacon until you all the right stuff!
This recipe I use for Makin’ Home Cured Bacon is good for bacon from 4-6 pounds. I use it on the bellies in this size range where Sam’s Club only carries ½ bellies without the skin. There is a great cure calculator (and overall a fantastic place to get info on all things smoke, grill, and BBQ) on the “Amazing Ribs” website. You must do this so that you can get the exact amount of cure that you need.
I highly recommend using this wet cure recipe if you’re starting with making your own bacon. Curing this way will make sure your bacon is cured properly and is ready for smoke quickly. I also recommend getting a food scale that does weight in grams and uses decimal points to get the exact amount of “Pink Salt” so that you get the right ppm cure and that your bacon will last in your fridge up to 3 months.
Get all the ingredients laid out, grab an 11”x16” FoodSaver Bag. These bags fit Sam’s Club belly perfectly. I then add all the wet ingredients first and then add all the dry ingredients. Mix them all up. Then use a big pot filled up with water, place the bag with the belly in it to push as much of the air out of the bag, and then use my FoodSaver to seal the bag. Flip and shake the belly so that all the dry ingredient gets well mixed in.
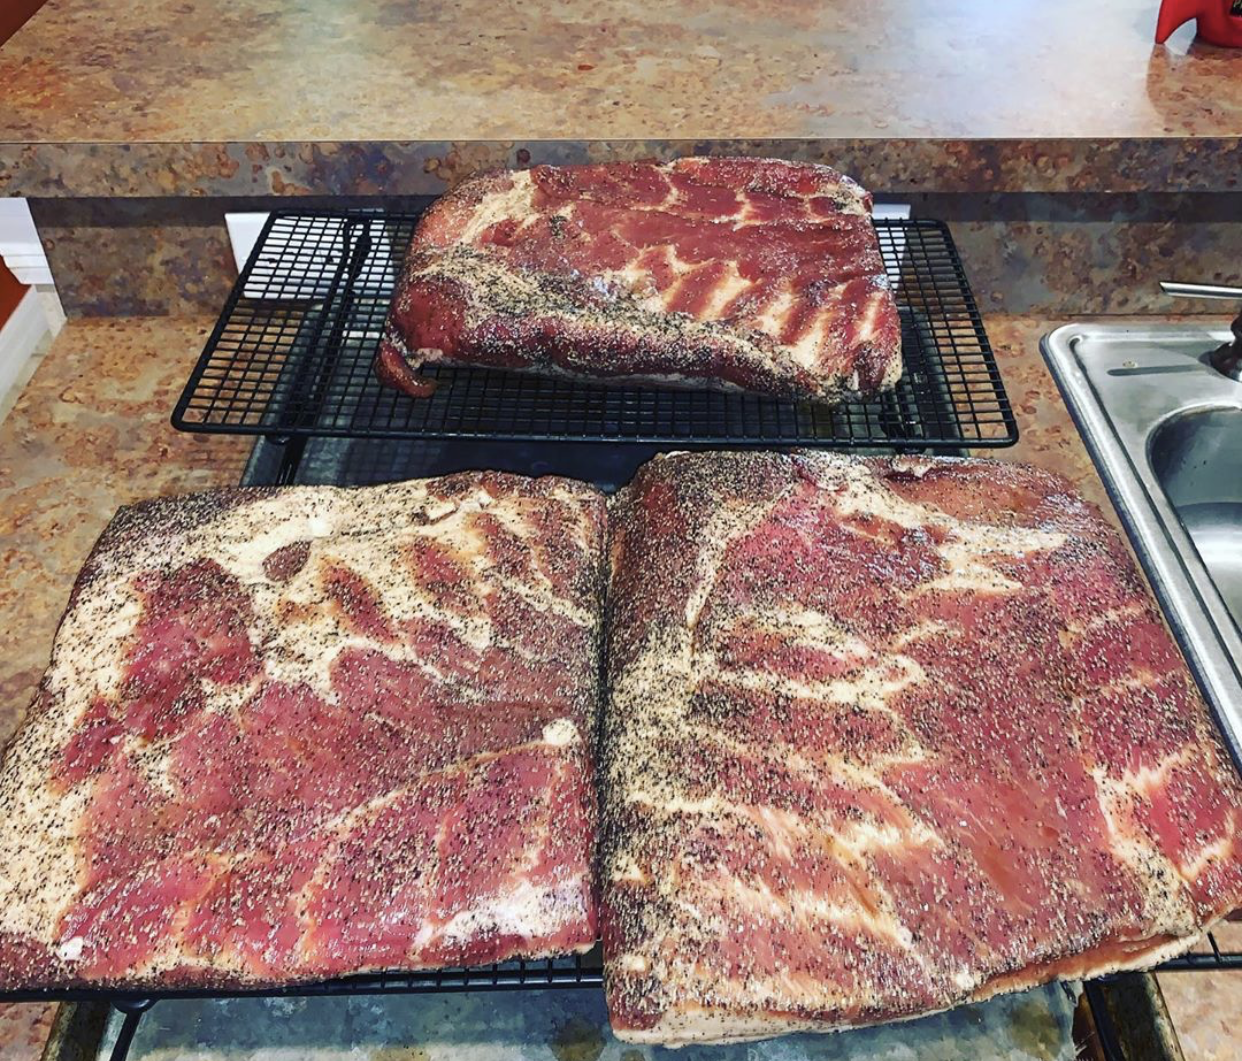
A few last essential things while you refrigerate your belly as it cures. Make sure that you flip your bacon every day. This helps the cure go through the belly evenly. Ensure that you leave your belly in the cure solution and seasoning for a minimum of what the cure calculator says. I usually start my bellies cure on a Monday and then smoke them on a Friday. Your bellies can stay in the cure solution for however long you want. This belly here, according to the cure calculator, should cure in 3 days. I could smoke them Thursday. The bellies will be smoked on Saturday Morning.
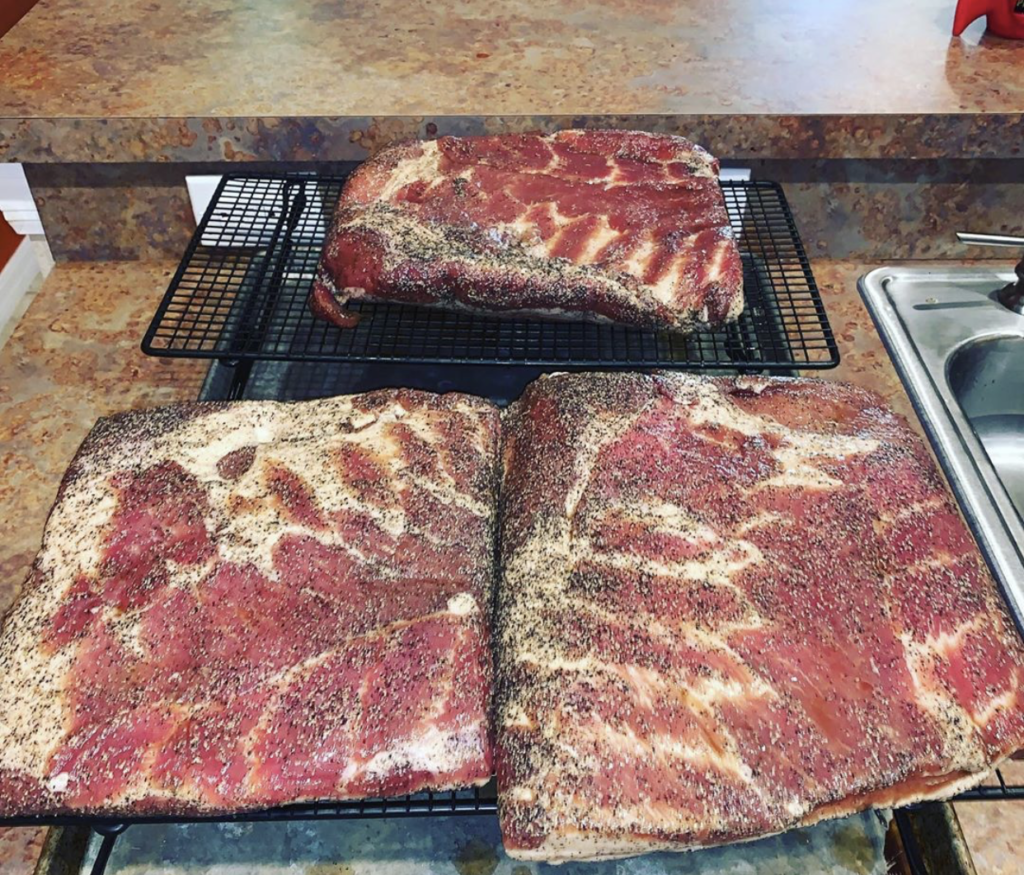
When I smoke my bacon (they are all cured now, so they are now bacon), I will use different woods and pellets depending on the bacon. What makes my maple bacon, triple maple bacon, is I use maple wood or pellets along with using maple sugar and maple syrup. With Asian bacon, I like to use a bit of a hardier wood like hickory or a blend of maple, hickory, and cherry. For my regular breakfast bacon, I will usually use Cherry or Pecan wood. These have a light flavor and doesn’t overpower the seasoning.
These recipes are not overpowering in salt. I worked hard to get the salt levels proper. Bacon shouldn’t need to be soaked before smoking. If you want to test the bacon’s to see if they are too salty or not for you, slice off a piece and fry it up quickly and test it. When you try it and if it’s not too salty, then go ahead with smoking. If it is too salty, get a pot and fill it with water and soak your bacon for an hour or so. However, it will lighten the flavor you get from all other seasonings.
Depending on what you want for a smokey flavor, you can either cold smoke or hot smoke your bacon. With cold smoking, you want to make sure that you keep your temps low. This will make it so that you don’t accidentally cook the bacon while it’s on the smoker. I use a 12-inch smoker tube. If you fill it with pellets, this will add smoke to your bacon for around 4 hours. Once you cold smoke your bacon for the 4 hours, take in your bacon wrap it in plastic wrap. Place the bacon in your fridge for 24 hours. Put the bacon on the smoker and cold smoke it again. Repeat that process for three or four days. After you make it through your cold smoke, you should leave it wrapped in the fridge for three days before slicing.
When hot smoking with a pellet grill, I let the bacon smoke at 200° until the internal temperature gets 145°. If you want some extra smokey flavor, add a smoker tube. Let the smoker tube go while your bacon gets up to temp. If your smoking on a traditional smoker or egg-style smoker, make sure you use indirect heat and keep your smoker between 225° and 250°. Please make sure you still pull your bacon when it hits 145°. Wait at least 24 hours before you slice
Here are a few last points for Makin’ Home Cured Bacon. As noted above, make sure you use high-quality ingredients. They make all the difference in favor. After you get your bacon feet wet, you can go through and create your bacon creations. Black pepper and jalapenos are the most popular people make in the Facebook groups that I am apart of. These creations are the ultimate food hobby that will impress your family and friends.
I hope that you enjoy these recipes on What I Ate! Please leave comments below and let me know how you like my bacon!
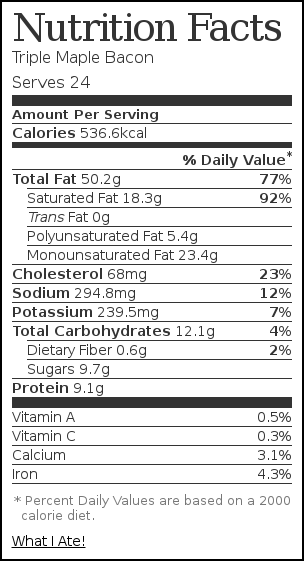
Triple Maple Bacon
Notes
Please use the cure calculator to determine the proper amount of Prague powder #1 you need for your pork belly.
I highly recommend using maple wood for the type of bacon, however pecan, apple or cherry will complement the bacon very well.
Ingredients
- 5 Pounds of Pork Belly Skin off
- 1.5 Cups of Distilled Water
- Prague Powder #1 (Use Cure Calculator To determine the proper amount)
- 1 Cup of Grade A Dark Maple Syrup
- 1/2 Cup of Corse Black Pepper
- 1/3 Cup of Sea Salt
- 1/3 Cup of Maple Sugar
- 1/2 Teaspoon of Cayenne Pepper (Optional)
Instructions
- Place Pork Belly in a One Gallon FoodSaver Bag
- Pour Water and Maple Syrup into bag with pork belly
- Add all dry ingredients into the bag with the Pork Belly
- Use FoodSaver to remove as much air as possible and seal the bag
- Flip bacon every 24 hours for the next 72 hours
- After 72 hours your bacon is ready for some smoke
- Cold Smoke for 4 hours, wrap in plastic wrap and refrigerate for 24 hours. Repeat this step for 3 days.
- Hot Smoking with a Pellet smoker using maple pellets set your temperature at 200° and smoke until the internal temperature reaches 145°.
- Hot Smoking with a traditional smoker or kamado-style smokers smoke with indirect heat between 225° and 250° using 2-3 chunks of maple wood until bacon reaches an internal temperature of 145°





No Comments